

How To Choose The Right Camera Lens Cases 2026
A lens case is a small piece of kit, but it has a large job: keeping expensive glass from being knocked, scratched, soaked, or buried under the rest of your equipment. The right case should fit the lens in the configuration you actually carry, protect it from the conditions you actually work in, and remain easy to access when a moment is already disappearing. A case that only looks suitable in a product thumbnail is not doing much work for you.
Quick Answer
Choose a lens case by measuring the lens with its caps, hood, collar, or other attached hardware in the configuration you will carry, then compare those measurements with the case’s internal dimensions. Verify lens compatibility, padding, closure, and weather protection on the individual product listing rather than relying on a category label or a generic “universal” claim. The best case is the one that holds the lens securely without compressing it, rattling around it, or slowing you down in the field.
Table of Contents
- Quick Answer
- Our Top Picks
- Start With the Lens’s Working Shape
- Measure the Lens in Its Real Carrying Configuration
- Match Protection to the Assignment
- Make the Case Work With the Rest of the Kit
- Verify the Individual Listing, Not Just the Category Page
- Frequently Asked Questions
- Sources & References
Our Top Picks
Affiliate disclosure: if you buy through these links, we may earn a commission at no extra cost to you.

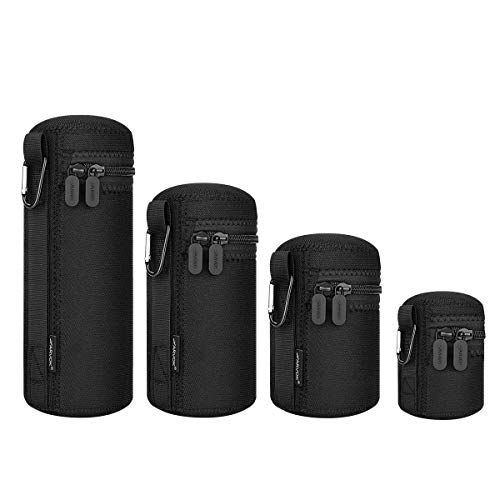

Start With the Lens’s Working Shape
The first question is not “Which lens case looks nicest?” It is “What exactly am I protecting?” A compact prime carried with front and rear caps needs a different amount of room from a long zoom with a reversed hood, tripod collar, or quick-release foot. A lens case is not a magic pouch that turns every piece of equipment into the same tidy cylinder. Camera gear remains irritatingly physical.
Start by separating the lens from the other equipment in your kit. A camera body with a lens attached may need a camera insert or a dedicated compartment rather than a lens-only pouch. A flash, radio trigger, memory-card wallet, or drone accessory may fit inside an empty space, but that does not mean the lens case is designed to protect it. If the case is for a lens that stays mounted on a tripod collar during transport, measure that complete assembly instead of pretending the collar will politely disappear.
This matters because the word “camera” covers a lot of shapes. The Case Cameras taxonomy separates IP, dome, bullet, PTZ, fisheye, 360°, smart, and explosion-proof cameras. It identifies MD and VD as dome-camera series, WB, EB, and MZ as bullet-camera series, and TZ and TP as PTZ-camera series, alongside FE fisheye, TS 360°, smart, and EX explosion-proof lines. Those labels are useful for identifying equipment form factors, but they do not establish compatibility with a photographic lens case. A case designed around a generic “camera” label may be describing an entirely different object.
Measure the Lens in Its Real Carrying Configuration
Measure the lens’s length and widest diameter with the front and rear caps fitted. If you carry the hood reversed around the barrel, include it in the measurement. If you expect to put the lens into the case with the hood deployed, measure that arrangement instead. The filter-thread size is not a substitute for the lens’s actual outside diameter; it describes the front mounting thread, not the complete shape of the barrel and hood.
Compare your measurements with the case’s internal dimensions, not its advertised outside dimensions. The case must be long enough for the lens to enter without force and wide enough that the zipper or flap does not press against the barrel. A lens can technically fit while still being a poor fit if the mount catches, the hood jams, or a tripod collar creates a hard spot against the side of the case.
The ideal fit is secure without being punitive. The lens should not slide around enough to build momentum when the bag is set down, but you should also be able to remove it without wrestling the case open with both hands. Check how the closure behaves when the lens is inside. If the zipper bows, the flap will not sit flat, or the case needs to be compressed to close, the dimensions are wrong even if the listing says the lens is compatible.
Match Protection to the Assignment
Protection should follow the assignment, not marketing language. For an indoor editorial job or a quick walk-around shoot, a padded soft case may be useful because it prevents lenses from rubbing against each other in a camera bag. For air travel, rough location work, or a day spent moving between a vehicle and a wet outdoor set, you need to pay much closer attention to the case’s structure, closure, and stated weather protection.
Padding protects against knocks, but it does not automatically make a case weather-resistant. Look for a clear description of the padding and the closure rather than assuming that a thick-looking fabric is enough. A drawstring, zipper, flap, or hook-and-loop closure each behaves differently when the case is stuffed into a bag, carried on a strap, or opened repeatedly with cold hands. If the listing does not clearly describe weather protection, treat that protection as unverified. Hope is not a coating.
Think about the direction and severity of the risk. A lens carried loose in a shoulder bag may need protection from side impacts and contact with metal hardware. A lens in a roller case may need enough structure to keep neighboring equipment from pressing into it. A photographer working near sand, dust, spray, or rain should be more conservative about exposed openings and closures than someone photographing in a dry studio. Your case does not need to be built for an expedition if it will spend its life in a padded camera backpack, but it should not be asked to do that job by accident.
Make the Case Work With the Rest of the Kit
A lens case that fits the lens but ruins the bag’s layout is still a poor choice. Check whether you will carry it vertically or horizontally, whether the case can be removed without unpacking the camera body, and whether its shape blocks access to batteries, memory cards, or a second lens. On a fast-paced assignment, a case that requires a small excavation every time you change focal lengths will eventually be left at home.
Tripod work adds another layer of practicality. If the lens remains attached to a tripod collar or quick-release foot, measure the complete setup and make sure the case does not press against the hardware. If you remove the collar before packing, confirm that the collar has a safe place elsewhere in the bag. The same principle applies to lighting equipment: keep a lens case from becoming a catch-all pocket for flash triggers, cables, and adapters. Small accessories have a talent for finding the front element when nobody is looking.
Drone kits deserve their own separation as well. A lens case may be useful for a detachable camera or gimbal component if its dimensions and padding suit that part, but it should not automatically become storage for every drone accessory. Propellers, controllers, cables, and batteries have different shapes and handling requirements. Keep them organized in storage intended for those items, while the lens case does the narrower job it was designed to do.
Verify the Individual Listing, Not Just the Category Page
Category pages are useful for finding the general type of accessory, but they are not fit checks. The supplied Amazon lens-case source is a category page titled “Camera Lens Bags & Cases” and uses browse node 3346101 in its URL. The other supplied Amazon photography-bags source is an Electronics category page titled “Bags & Cases” and references camera cases and binocular cases. Those titles tell you where the products are filed. They do not tell you whether a particular case fits your 24–70mm zoom with the hood reversed.
Before relying on an individual listing, verify five things in plain language: the internal dimensions, the stated lens compatibility, the padding or structure, the closure, and the weather-protection claim. If the listing provides a compatibility chart, cross-check the exact lens model rather than assuming that two lenses with similar focal lengths have the same physical dimensions. If the listing only gives an external measurement or uses a broad size name, you still have an unanswered fit question.
In the supplied Amazon extracts, no individual lens-case product names, dimensions, materials, padding details, prices, ratings, or capacity specifications are visible. The extracts show category and navigation text instead, with zero visible individual product listings containing lens-case specifications. That means the material is enough to identify a shopping category, but not enough to recommend a specific case. The responsible next step is to open the individual listing and verify the details against your own measurements.
Frequently Asked Questions
Should a lens case be exactly the same size as the lens?
No. The case should be slightly larger internally so the lens can be inserted and removed without force, but not so large that it rattles or shifts substantially during transport. Compare the lens’s real carrying dimensions with the case’s internal measurements.
Do I need a separate lens case if my camera bag already has padded dividers?
Not always. A well-fitted padded compartment may be enough for routine work. A separate case becomes more useful when lenses are carried outside the camera bag, stacked with other equipment, moved through rough conditions, or stored in a larger roller or vehicle case.
Are universal lens cases a safe choice?
Only when the internal fit, padding, and closure are suitable for your particular lens. “Universal” describes the intended range, not a guarantee that the lens will remain stable or that the case will close without pressure.
Can I use a lens case for flash equipment or drone accessories?
You can use it only if the item fits securely and the case provides appropriate protection, but a lens case is not automatically suitable storage for every accessory. Flashes, triggers, drone components, cables, and batteries should be organized according to their own shapes and handling needs.
How much padding and weather protection do I need?
Match both to the assignment. Indoor work inside a padded camera bag may need less structure, while travel, rain, dust, vehicle transport, or exposed location work justify closer attention to padding, closure design, and explicit weather-protection claims.
What can an Amazon category page tell me about a lens case?
It can help you find the general product category, such as “Camera Lens Bags & Cases,” but it does not establish fit or protection. Check the individual listing for internal dimensions, compatibility, padding, closure, and weather protection before making a decision.
The right camera lens case is the one that matches the lens’s actual working shape, protects it against the risks of your assignments, and fits cleanly into the way you carry the rest of your equipment. Measure the lens with its caps and hood arrangement, note any collar or attached hardware, and check those measurements against the individual listing’s internal dimensions and protection details. That is your next step: measure the lens you use most, then reject any case whose fit or protection claims remain vague.


