

How To Choose Cameras For Travel In 2026
Travel photography is a negotiation between image quality, airline restrictions, changing weather, and how much weight your shoulders will tolerate before filing a formal complaint. The right camera is not necessarily the most capable body on paper; it is the one that fits your itinerary, stays accessible, and gives you enough control to handle the light and subjects you are actually going to encounter.
Quick Answer
Choose the smallest interchangeable-lens camera you will genuinely carry, then build around one versatile lens, dependable batteries, reliable memory cards, and a bag that protects the kit in the cabin. Prioritize handling, autofocus, weather resistance, battery life, and lens coverage over headline specifications. A rear-access backpack suits walking and hiking, a rolling case suits airport-heavy travel, and a shoulder bag suits fast lens changes; whenever possible, keep the whole fragile kit under the seat rather than out of reach in an overhead bin.
Table of Contents
Our Top Picks
Affiliate disclosure: if you buy through these links, we may earn a commission at no extra cost to you.
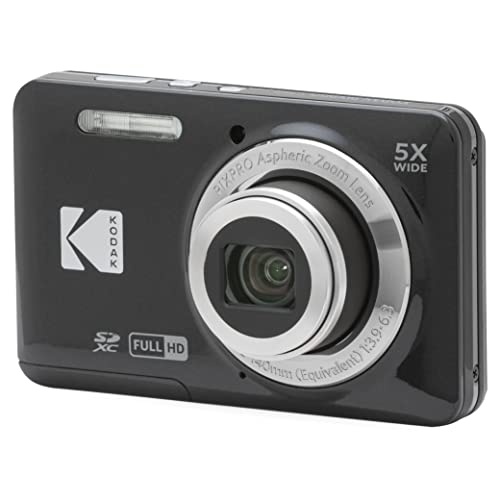


Choose for the Itinerary You Actually Have
Start with the trip, not the camera aisle. A week of city walking, museums, cafés, and train platforms demands a different setup from a wildlife trip, a mountain trek, or a destination wedding. Write down what you expect to photograph, how far you will walk each day, and whether you will have time to change lenses deliberately. That exercise usually eliminates half the equipment before a spec sheet gets involved.
For general travel, handling matters more than a small advantage in resolution. You want controls you can operate without taking your eye from the viewfinder, a grip that remains comfortable after several hours, dependable autofocus in uneven light, and a battery that does not turn every lunch stop into a charging session. Weather resistance is useful, but it does not make the camera waterproof; it simply gives you more margin when the forecast becomes optimistic fiction.
Think about the camera as something you will carry between photographs. If it is awkward to retrieve, too heavy for a full day, or intimidating enough to leave in the hotel room, its theoretical image quality is irrelevant. I would rather work with a slightly smaller body that is ready during a sudden street scene than carry a more elaborate kit that appears only for planned landscapes.
Treat the Camera and Lens as One System
A camera body does not make a travel kit useful on its own. The lens determines how often you can get the framing you want without moving into traffic, backing into a fountain, or explaining yourself to a guard. For a mixed itinerary, one versatile zoom is often the most practical starting point because it covers changing subjects without constant lens swaps. The trade-off is size, weight, and sometimes a smaller maximum aperture.
A compact prime can make sense when low-light work, environmental portraits, or a discreet street setup matters more than framing flexibility. It may be easier to carry and less conspicuous, but it asks you to move your feet and accept that some scenes will not fit. That is not a flaw. Constraints can sharpen your decisions, provided they match the way you like to work.
Longer lenses are valuable for wildlife, distant details, compressed landscapes, and performances where you cannot approach the subject. They also consume space quickly and make the camera harder to keep ready. If the itinerary involves both long walks and occasional distant subjects, decide whether those photographs are central to the trip or merely a possibility. “I might see a bird” is how a reasonable day bag becomes a small equipment department.
Do not forget the lens-change problem. In dusty markets, windy viewpoints, or damp streets, every swap exposes the camera and creates another opportunity to drop something expensive. A two-lens kit can be perfectly sensible, but it should have a clear purpose: one lens for most of the day and one for the subjects the first lens cannot reasonably handle.
Build a Cabin-First Packing System
Fragile and valuable equipment belongs in your carry-on. Keep the camera body, lenses, every spare battery, memory cards, and other irreplaceable accessories with you rather than placing them in checked luggage. Spare lithium batteries for cameras, drones, and action cameras should remain in the cabin, not in a checked suitcase. Airline rules can vary, so check the current policy before departure instead of trusting a packing list from a previous trip.
For safer packing, detach the lens from the camera body, fit the body cap and lens cap, and place both pieces in snug padded compartments. Keep the camera and lenses toward the middle of the bag, with glass away from the outer wall where a careless knock has the clearest route to the front element. Dividers should hold the gear firmly without forcing it into place; compression is not the same thing as protection.
Keep small accessories in separate pouches. Batteries, memory cards, filters, cables, and card readers should not be loose in the main compartment where they can scratch a lens or disappear beneath a camera body during screening. A small zipped plastic case works well for batteries. Leave one battery in the camera so it can be powered on if airport security requests a demonstration, while the remaining batteries stay organized and protected.
Whenever the airline and the bag dimensions allow it, keep the camera bag under the seat rather than in the overhead bin. This is especially useful on basic-economy fares, where overhead-bin access may be limited. Under-seat storage also keeps the kit in your sight and avoids the familiar overhead-bin ritual of watching somebody force a hard suitcase into the exact space occupied by your front element.
Make the Bag Carry the Load
Travel camera bags generally fall into three useful formats: backpacks, shoulder bags, and rolling cases. A rear-access backpack works well for walking, hiking, and crowded streets because the equipment is protected when the bag is worn and the weight is distributed across both shoulders. A shoulder bag gives you faster access to a lens change but creates one-sided fatigue over a long day. A rolling case is comfortable through airports and useful for heavier loads, but it becomes awkward on stairs, cobblestones, and any route that was designed by someone who disliked luggage.
Choose the bag according to the itinerary rather than the size of the camera alone. Look for a design with international carry-on dimensions if it will travel frequently, customizable dividers for irregular equipment, weather-resistant materials, and a rain cover if the route includes outdoor work. Rear access is particularly useful when you need to put the bag down in a crowded or dirty place without exposing the camera compartment to every passing elbow.
Pack the heaviest gear at the bottom of a backpack, closest to the hinge or the part of the bag nearest your back. This keeps the center of gravity low and makes the load feel less unstable while walking. Put batteries, cards, filters, cables, and card readers in separate pouches rather than scattering them through the camera compartment. Good organization is not decorative; it reduces handling, searching, and accidental contact with the glass.
Protect the Working Kit: Batteries, Cards, Support, and Drones
Memory cards deserve the same practical attention as lenses. Carry enough cards for a full shooting day, but do not treat a card as a permanent archive. Rotate used and unused cards in separate pouches, and offload important images when you have a reliable opportunity. A card reader, the correct cable, and a small backup drive can be more useful than another minor accessory that duplicates something already in the kit.
A tripod should solve a problem rather than represent an aspiration. For landscapes, night scenes, architectural interiors, or deliberate self-portraits, a stable travel tripod can justify its space. For casual city work, it may spend the trip strapped to the outside of the bag while adding weight and catching on doorways. Check the folded length, the weight of the camera and lens it must support, and whether the quick-release plate fits your camera without requiring a separate tool.
Lighting equipment needs the same scrutiny. A compact flash can help with portraits and difficult interiors, while a small continuous light can be useful for close subjects, detail work, or a quick video setup. Either option adds batteries, chargers, and another item to protect. If you rarely use artificial light at home, travel will not suddenly turn you into a lighting technician. Take it when the assignment requires it, not because the empty compartment looked lonely.
Drones need a cabin-first approach too. Keep the aircraft, controller, batteries, and delicate propellers protected and accessible, with lithium-ion batteries carried in the cabin rather than checked luggage. Check the airline requirements and the destination's flight restrictions before packing; a drone that cannot legally or safely leave the bag is just an unusually expensive paperweight. The same rule applies to camera accessories generally: protect the fragile parts, isolate the small parts, and make inspection straightforward.
Frequently Asked Questions
Should I take a mirrorless camera or a DSLR for travel?
Either can work if you already know the camera and will carry it consistently. Compare the complete system rather than the body alone: camera, lenses, batteries, charger, cards, and bag. Familiar controls and a manageable load matter more than switching systems for a specification advantage you may never use.
Is one lens enough for a travel photography trip?
For many general trips, one versatile lens is the most efficient choice. Add a second lens only when it covers an important subject or working condition that the first lens cannot handle, such as distant wildlife or very low-light interiors. Every extra lens also adds weight, packing decisions, and opportunities for dust to enter during a change.
Can I pack my camera and drone batteries in checked luggage?
Keep spare lithium-ion batteries for cameras, drones, and action cameras in your carry-on rather than checked luggage. Protect the battery contacts and keep the batteries organized in an accessible case. Check the current airline rules before flying because limits and procedures can change.
Which camera bag is best for travel?
Choose by itinerary. A rear-access backpack suits walking and hiking, a shoulder bag provides quick access at the cost of one-sided fatigue, and a rolling case works well for airports and heavier equipment but poorly on stairs and rough ground. Look for padding, adjustable dividers, weather resistance, a rain cover, and dimensions that fit your cabin plan.
Do I need to bring a tripod?
Bring one when you have a clear use for it, such as night photography, long exposures, architecture, or planned portraits. If the trip is mostly spontaneous street photography, the tripod may become luggage rather than equipment. Test the setup at home so you know it can support the camera and lens you intend to use.
How should I protect memory cards and small accessories?
Use separate pouches for unused cards, used cards, batteries, filters, cables, and card readers. Keep cards accessible but secure, and offload important images when you have a dependable backup opportunity. Loose accessories are excellent at scratching lenses and hiding precisely when airport security wants to inspect the bag.
Choose the camera you will carry, the lens that covers the work you expect, and the bag that keeps the whole system accessible in the cabin. Then pack around the real trip: test the load, organize the batteries and cards, decide whether support or lighting gear earns its space, and verify the rules for any drone or lithium battery before leaving. Your next step is simple: assemble the complete kit tonight and take it for a proper walk; the honest answer will emerge before the airport gets involved.


